Friday, September 08, 2006
It really shouldn't be this hard...
I've since discovered more problems with the pattern/instructions. Surprised? I'm not.
1. At first I thought the handles on the front were only stitched into the seam at the bottom of the bag. I didn't see how they'd be secured and thought they'd just be all floppy inside the pocket. But looking at the line drawing I see that they are also stitched at the top.
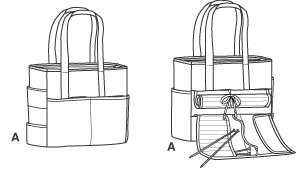
But I still think the unsecured handles along the front of the bag will get tangled up with the stuff in the pocket and I think only stitching at the top and bottom seam is rather weak for tote bag handles. I top stitched the handles down to the bag for where they're hidden by the pocket so they'll be stronger.
2. The instructions say to gather between the notches of the front pocket piece - the notches are supposed to correspond to where each handle is attached at the bottom seam. I found two problems. Aesthetically I didn't really like that only half the pocket had fullness - flat from edge to handle (notch) and full from there to the center of the bag. It seemed rather odd to me to have an asymetrically shaped pocket like that. Then I noticed that the notches on the pocket and the front didn't even line up. The drawing shows them lining up but the notches on the pattern pieces do not. Oh, but they would line up if you gathered across the pocket instead of only between the notches. Interesting. I gathered evenly across the pocket.
The back of the tote bag consists of three pieces because the needle rolls will be attached into the seams between each of these pieces. Of course when I cut my fabrics I followed the instructions, which means the back lining is also in three pieces. Not a big deal for the lining to be seamed but I think it now provides me a way to incorporate a missing feature of this tote bag. This is supposed to be a tote bag for knitters, but there is no little bag for all the knitting notions, like tape measure, point protectors, row counter, stitch markers, etc. I think I will make a little zippered pouch and attach it into the seams of the lining, but (and I just now thought of this) I will put that part of the lining on the other side (front) because the back of the bag will already be thick with seam allowances from with the needle rolls.
This bag is taking much too long! And I'm not looking forward to finding more mistakes. I thought I would whip this bag up in time for my ASG sewing group next Tuesday night but at this rate that's not going to happen. I didn't set out looking for a challenging project but I sure got one!
Tuesday, September 05, 2006
Sewing a knitting bag
I'm using fabric that's from the "Ugly Fabric" challenge of my sewing guild neighborhood group. A few months ago we put what we considered to be ugly fabric inside a paper bag for a white elephant gift exchange with the goal of making a handbag or tote. I did pretty well as the fabric I "won" isn't exactly ugly - well, maybe not the best choice for a garment, but certainly fine for a handbag or tote. What's the fabric look like, you ask? Ah, photos...I don't know how all the bloggers can add so many photos to their blogs every day. I never seem to find time to do this, so sorry, no photo. I will photograph the final product, if I ever get there. The fabric is navy blue with thin strips of green, red, yellow and white.
The pattern has a zillion pieces but thankfully they're all rectangular in shape. Since my fabric is striped I took the extra time to cut out the pieces on a single layer so as not to wind up with noticeably wonky pieces. There is also lining, so many of the pattern pieces had to be cut out multiple times. I found a suitably matching cotton in my stash to use as the lining - you know you have too much stash when fabric begins to unintentionally match! My fabrics were not very substantial so I decided to use canvas as an interlining. More cutting...
Finally I began to assemble the tote, following the instructions. Big mistake.
Time was I stayed away from Simplicity patterns like the plague. I found their garment patterns fit poorly (make it in 2 hours and easy fit were synonymous with no fit in their case). I found their instructions were lacking, confusing, or erroneous. Lately their designs have improved and I've found myself buying quite a few at the fabric chain store sales. I haven't sewn any...until now.
My first warning with this pattern was that their suggested fabrics included lightweight broadcloth, calico, and gingham, but there is not a hint of interfacing mentioned anywhere. The tote I'm making has two needle roll-ups, for which they do specify "pre-quilted fabric." I'm not sure why, except maybe they thought the padding might protect the needles somehow. I don't have any pre-quilted fabric so I decided that when it came time to make the roll-ups, I might add some thin cotton batting between the layers.
I sat down to sew and right away hit the first question mark. The instructions say to "attach the lining" to the large rectangular back piece. Huh?? I've only made a couple of totes and handbags but all of them had a lining constructed separately from the outside fabric so that the seam allowances are all hidden. These instructions called for basting the outer fabric and lining together on each of the bag pieces. Although I questioned it, I went ahead and did so for the back piece, sandwiching the canvas inside to give it more stability. After basting the handles on, the next step was to add an exterior pocket. I did as instructed and then realized that the pocket wasn't lined. Thinking I must have made a mistake, I looked back over the pattern layout and found that, no, I followed the instructions. No lining for the pocket. They expect the exterior pockets of this tote to be made of one layer of the flimsy broadcloth, calico or gingham and nothing more. I had backed my pocket piece with canvas so it didn't look too bad without lining. Besides, I reasoned that this was ok since I didn't really want it to look all matchy-matchy with the lining and outer fabric. That was as far as I got last night and then I went to bed.
This tote bag was on my mind early this morning when I was trying to get a few more minutes of shuteye - my brain doesn't like to shut off when there are problems to be solved. I got up and looked at the instructions and I simply do not see how, following their instructions, you can avoid having raw seam allowances inside the bag! I thought maybe they expect you to finish all the seams with binding tape, since it calls for binding tape to be used all over the place anyway. But no. I've decided to take apart the piece I started and sew the inside lining separately and then place the lining inside the bag with the seam allowances hidden. The raw edges at the top of the bag are to be bound by the tape anyway, so I think my plan should work. I'm also going to fix that pocket and add another layer of the outer fabric.
I'm angry and disappointed at Simplicity for the poor construction techniques on this pattern. No sewer would be able to duplicate the look of the bags on the cover without adding interfacing (or stuffing the finished product full of paper). Unless I'm totally mistaken in how I interpreted their instructions, the bag would have raw edges on the inside. I've made only a few handbags from patterns and the one thing I found is that you have to trust the pattern. Basic clothing pieces are pretty easy to figure out - you have a front, a back, perhaps two sleeves, maybe a collar...and you almost always sew right sides together. When the instructions have an error, it's often easy to catch. But a handbag can seem to be a complicated mess during construction, especially if it contains inside pouches, zippered pockets, and tabbed closures. You may need to sew a right side to a wrong side or sew something in an awkward manner. I guess I was hoping that this Simplicity pattern would magically come out right in the end. I'm sure glad I didn't get very far along and I'll just need to spend an evening with my friend, the seam ripper, and then figure out the rest of the sewing on my own.
Saturday, September 02, 2006
About knitting...and not about knitting
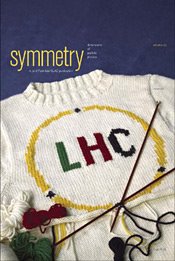
But alas, it's not about knitting. I work with physicists (although I am not one) and Symmetry is their publication about particle physics. I flipped through it hoping to find something linking knitting with physics but no, it was just cover art. The website for the magazine says about the cover:
After years of knitting together skein after skein of components and contributions from far and wide, the Large Hadron Collider at CERN is close to putting the final stitches in place. And like this handmade sweater, the final product should wear well on particle physicists for many years to come.
Too bad. However, I do think that's a sweater only a particle physicist would love, though it may not be the knitter's fault. I thought maybe the knitter is a physicist (one of the women I work with, who is a physicist, knits. We got a laugh out of this issue and shared our disappointment that there was no knitting content inside). The publication gives credit for knitting the sweater to Corrine Niessner, who in fact is not a physicist and knits much, much nicer things. She was hired to knit this sweater and writes about it in her blog.
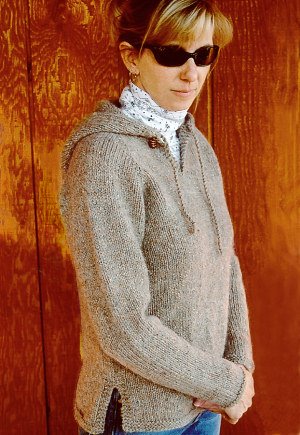
As far as my knitting is concerned, I have almost finished my socks. I have a few rows left and the Kitchener stitch to do to close them up. Having only done the Kitchener stitch in my Knitter's class last February, I don't think it's commuter-friendly so I started a new project - the Top Down Tunic from Knitting Pure and Simple.
(picture from their website
I'm using Rowanspun Aran in "Gables", a dark red color. The gauge was exactly right, so I'm off and knitting. This is a top-down sweater, which I've never done before. So far so good. The instructions are pretty thorough, even telling you that it'll look weird in the beginning but just follow the instructions and keep knitting. The website also has instructions and help on knitting top-down.
Friday, August 25, 2006
Where am I?
Monday, August 21, 2006
Japanese fabric goodness
Go check it out!
Wednesday, August 09, 2006
Woven and spun souvenirs
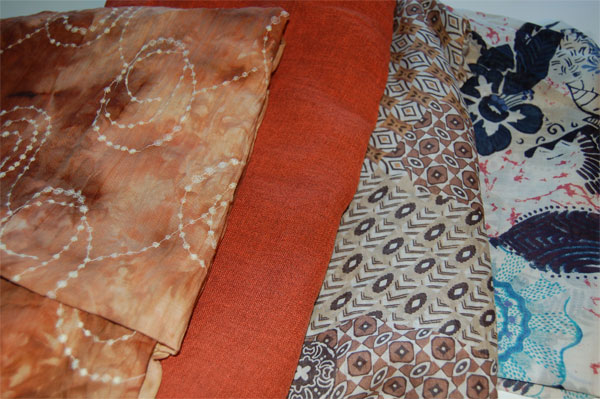
From left to right:
- crushed cotton with embroidered design
- linen blend
- lightweight cotton
I'm thinking about making a jacket out of #2 and tops or blouses of some sort out of the others.
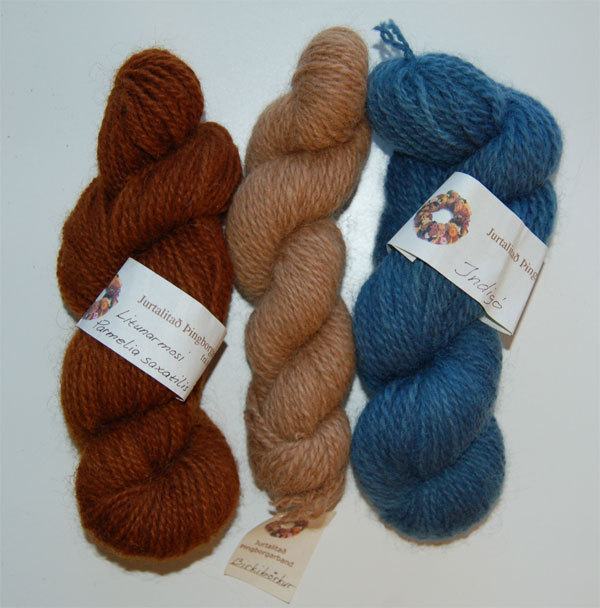
I also bought yarn during my trip. Naturally I bought yarn in Iceland, home of the Icelandic sweater. There were plenty of touristy sweaters to be had but even on the coldest day on record it would be too hot to wear at home. Before our trip I found a yarn shop to visit and craftily worked our itinerary to include a visit. The store, Þingborg Woolcenter, has a website and you can order from them. That funny "Þ" character is pronounced "th." While the store did have some fiber and handspun yarn, it was mostly a store for tourists. They had lots of handmade items from wool and felt and only a small selection of fiber. But I had to buy something of course.
According to the woman in the store, the yarn on the left was dyed with lichen and the one in the middle was dyed with Birch tree (bark, I presume). I'm thinking of making a bag with the yarn - maybe felted, maybe not.
It was nice to be in a place where knitting, spinning and weaving are thought of so highly. Not only did they have special signs marking where handcrafted goods were sold (and darn, I did not get a picture of any signs!), but you can buy yarn in the smallest of grocery stores. And good yarn too. It was cool.
When we were in Paris I didn't really seek out any yarn stores, figuring that most of the yarn is available in the US. I saw one Anny Blatt store but it was closed at the time and I never got back to it. I did browse the selection of needlework, buttons, trims, and yarns at Le Bon Marche, but either nothing caught my eye or else I could purchase the item at home, for less. I did shop at a little ribbon and button store near Place des Vosge. I bought some pretty (but expensive) trim. Forgot to take a picture of it though.
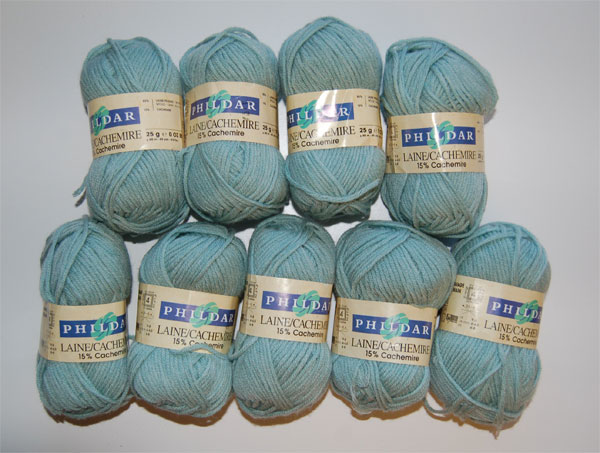
I hadn't planned on buying yarn, but when we were in Le Mans, I went to the grocery store with my friend and her mother in law and what did my wondering eyes behold, but a Phildar yarn store. My friend's mother knits so stopping in was not a problem. I bought this:
It is very soft (cashmere and wool blend) and was even on sale. However afterwards I regretted not buying some more in off-white, to use as trim or accent. I thought we could stop on our way out of town on Monday, but in France stores are closed on Mondays. I thought perhaps we could stop by when we returned, but that ended up to be the 14th of July - Bastille Day, and well, everything is closed of course! I guess it was meant to be. I have plenty of yarn anyway!
I'm still working (slowly) on the pictures from my trip. Eventually I'll get them posted.
Sunday, August 06, 2006
Canning 101
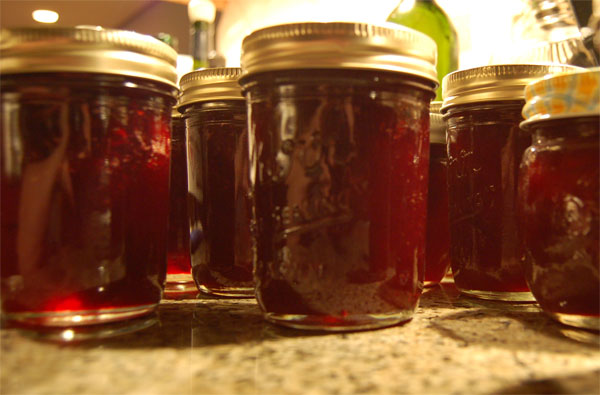
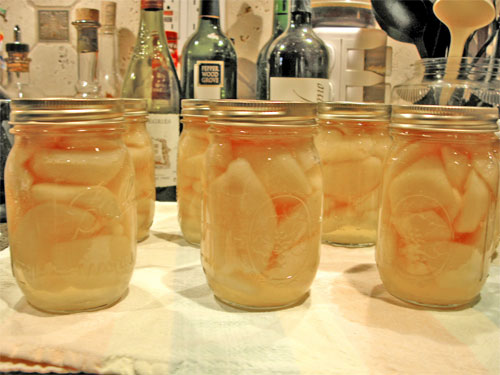
This is my third year making preserves. I've made apricot, plum, peach, and strawberry preserves and I've canned peaches and pears (whole pieces of fruit in a sugar syrup). I also made a tasty plum sauce. With the exception of the strawberries, all the fruit came from trees in our yard. While we grow strawberries, we don't yield nearly enough to make preserves, so we bought a flat of them from a roadside stand. I learned how to can from books and the internet. As I was stirring the syrupy mixture of plums and sugar to make more plum preserves on Saturday, I thought it might be nice to share what I know about making preserves.
Step 1 - The Fruit
If you are fortunate like I am to have the climate and yard to grow fruit trees, then you only have to harvest your own fruit. It helps to have a "trug" like these sold at leevalley.com:
If you don't have your own fruit trees, perhaps you can get ripe fruit at a good price at your local farmers market or roadside stand. Don't despair if all you have is the supermarket. You don't need bushels of fruit to make preserves. In fact, the recipes I have for fruit preserves typically call for about 2 lbs of fruit and you'll get about 5 half-pint jars out of it.
Step 2 - Equipment
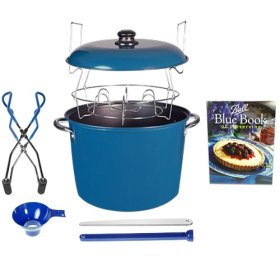
Preserving food was done out of necessity by our grandmothers, and their mothers, and their mothers... so you don't need a lot of equipment to do this. But it is better if you buy the right equipment. I use the "boiling-water" method of making jams. You can make freezer jam and you can use wax for sealing the jars, but I don't use those methods. The boiling-water method requires a large pot and mason jars with 2-piece lids. Only use modern jars - antique ones may be quaint but they may not seal properly and would not be safe to use. I also use a plastic funnel that has a wide mouth designed to fit the jars, and I use tongs specially designed to fit around the mason jars and useful to have when lifting the jars in and out of the water. Another useful tool is a stick with a magnet on the end for retrieving the lids from the hot water (the lids must be heated before putting them on the jars). I don't have one but I can see how it would be useful - I use tongs, which don't grab the lids very well. All of this equipment may be available at your hardware store (not the big-box kind though) and check your grocery store too. I'm sure you can buy them on-line as well. Just Google "canning supplies."
Step 3 - Recipe
I have the Ball Blue Book of Preserving and it contains everything you need as far as directions and recipes. This is one time when improvising is not a good idea. Follow the recipe and processing times. When I started making preserves I thought I could cut down on the amount of sugar but the fruit didn't seem to thicken as it cooked (sugar helps gel formation). So I added pectin (not called for in the recipe) and it thickened right away, but the final product out of the jars was nearly rock hard. I also thought I could double the batch to save time. Bad idea. Doubling the batch may make it cook unevenly. Stick to the recipe. Enough said.
Step 4 - Going for it
Set aside a couple of hours and don your apron to protect you from any juice splatters. Use a large cooking pot for cooking your fruit. Once it gets boiling it gets quite bubbly and frothy and believe me, you don't want the sticky fruit mixture overflowing your pot! I won't detail everything you need to know to make preserves, because it varies depending on what you're making. But the basic order is this:
1) Prepare the fruit (pit, peel, cut, whatever) according to the recipe. Unless the recipe calls for peeling the fruit, I leave the peels on because the skins add more color.
2) Heat the empty jars and lids to 180 degrees. I heat the jars in the big processing pot and the flat lids in a small sauce pan. You need the jars hot when you fill them, so while a dishwasher is fine for sterilizing them, they probably won't stay hot enough when it's time to fill them. You're not supposed to let the lids boil - I accidentally have and my jars still processed fine. The screw-on ring never touches food so don't worry about them. By the way, the flat lids can only be used once, so after you've enjoyed your jar of preserves, throw the flat lid away and only keep the jar and screw-on ring.
3) Cook the fruit according to the recipe. The froth will get kind of yellowy - you can skim this off with a spoon and dispose of it. The tricky part is telling when the fruit is done. This is when I wish I had the benefit of my grandmother's experience...but I'm about 30 years too late. I've tried to follow the "gel test" in the book but it just got me frustrated. However, I think I may be getting the hang of it now (especially now that I'm following the recipe!). While making the plum preserves this time, I noticed when the fruit reached boiling, it was quite frothy and almost boiling over. After it was boiling for a while, more fruit broke down and the liquid did thicken and the level of the mixture was lower. The temperature at which it's supposed to gel is 8 degrees above boiling, so if you're near sea level it's 212+8, or 220 degrees. I used a candy thermometer to confirm that I got pretty close to the gel point. The consistency of the cooked fruit at this point also looked nice and thick. The important thing is to cook it to 212 to kill bacteria. The preserves will thicken a bit more after they set. According to the Ball book, "a true preserve does not hold its shape when spooned from the jar."
4) Retrieve the jars from the hot water and fill them, again according to the recipe. For fruit preserves you generally fill to 1/4 inch from the top.
5) Put the lids on and return them to the big processing pot. Heat the water to boiling and leave the jars in for the time stated in the recipe.
6) After the processing time is over, turn off the heat, leave the jars in for 5 more minutes, then remove. You'll start hearing the tell-tale pop of the lids being pulled in by the vacuum inside the jar. This means you have a good seal.
That's about it. I haven't had any jars not seal and I haven't had any problems with my preserves. Despite past batches that were probably over-cooked, the preserves came out well. Even the rock-hard batch tasted good. Making preserves is pretty easy and safe as long as you use clean mason jars, follow the recipe, and follow the processing instructions.
The results are well worth it. The jars of preserves make good gifts - especially because we always have some on hand. I like to give them to friends and family because they're homemade and tasty. You do need to eat them within a few weeks of opening because they don't have the preservatives of commercially produced fruit spreads and may mold.
Happy canning!