


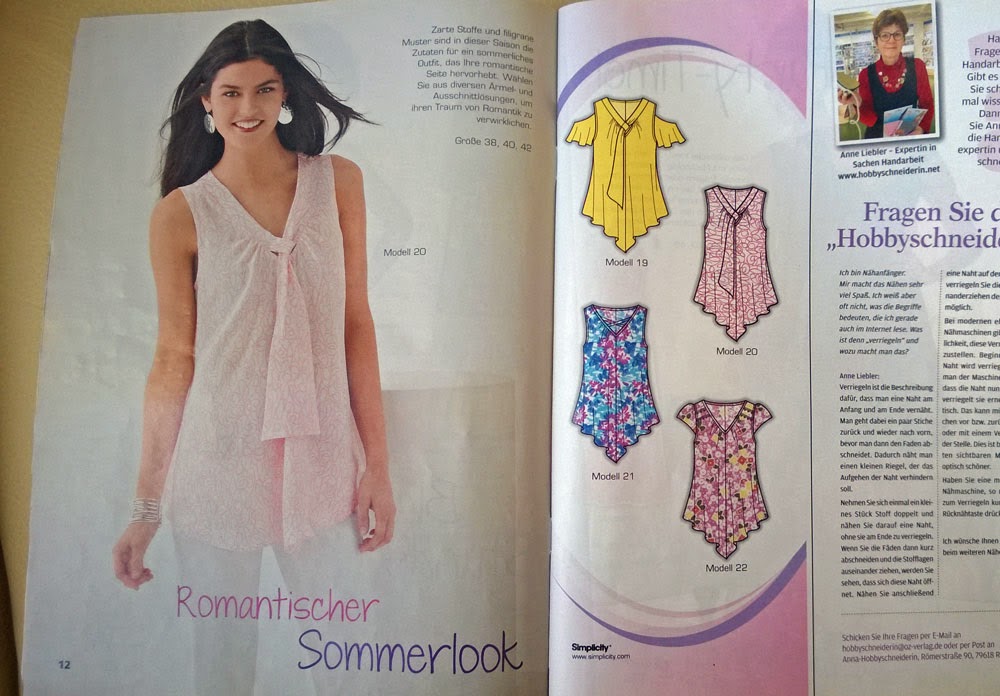
The fabric is cotton voile, purchased a year ago as a remnant from the Kartstadt department store fabric section. The pattern is from the Simplicity Meine Nähmode magazine, issue 3/2014, but it’s actually the New Look 6213 pattern.
 |
| When I get the magazine, I match the pictures to the Simplicity or New Look pattern. There are about 12-13 different patterns in each magazine. |
 |
| The magazine is published in Germany by OZ-Verlags-GmbH four times a year. |
 |
| I "just" have to trace them off! |
The first big question I had was: are the seam allowances included or not? It turns out they are, which is not like most European magazine patterns. However, it makes sense that the seam allowances are included here - why would they go to the trouble of redrawing the pattern pieces to remove them? Buried in a page of (a lot of) information about pattern markings and tips on sewing, it says that seam allowances are 1.5 cm (5/8") unless otherwise marked - although the patterns reproduced for the magazine contain very little in the way of markings. Also, not all the pattern pieces are included. If the piece is rectangular or square, they provide you with the dimensions, just like with Burda patterns I've used. That's not a problem, except that some of the pictures and instructions refer to notches and markings on those rectangular pieces and of course you have none.
For the most part this is a simple, straightforward top to sew, but I got bogged down by the instructions for the front band and ties. I couldn't tell how the band and ties were sewn on from the itty-bitty illustrations so I had to do a lot of unnecessary translation of instructions I didn't need. I didn't have extra fabric to cut new pieces so I wanted to be careful not to make mistakes that could not be fixed with a seam ripper.
One snag I had was with a word that I thought at first was just the last word in a sentence but turned out to be an abbreviation. To translate the German, I was using an app on my phone. I was perplexed when vord translated as 19A (what???) until I realized that vord is an abbreviation for vorderseite, meaning front side. It also took a bit of searching on the internet to find the sewing meaning of the word Blende. The word is not in my Ger-Eng dictionary, and the translator tool kept calling it aperture. It turns out it refers to the band that attaches at the neck - there's one with a loop (mit Schlaufe) and one with a tie (mit Schal).
Seeing that I was frustrated with these instructions, my husband suggested a brilliant, simple solution. Make a sample. I did, and once I understood the neckline, construction of the top went smoothly from there...until I melted the thread.
I had finished the raw seam edges with a three-thread overlock to keep them from raveling, but when I went to press the seams one more time, I was horrified to see the serger thread glob together and melt. I've never had this happen before. This is polyester serger thread I purchased here in Germany, a brand I've never used before, so maybe the thread I've been using in the past was more tolerant to heat, or maybe because I mostly use the serger on knits and don't press them (with a hot iron), I haven't encountered this before. At any rate, I didn't want to run the risk of melting the thread in the future, so I pulled out all the serger thread. Frankly I didn't like the way it looked anyway. I used a beige thread and although the color was invisible through the thin fabric, the texture from the overlock loops was noticeable. My choices of finishing the seams were now: pinking shears, Hong Kong finish and French seams. I don't have any pinking shears here and didn't want to run out and buy any, so that option was out - and besides, I think a pinked edge screams "homemade". I had just enough fabric left for a Hong Kong finish (applying binding to the raw edge) so I tried it on one seam to see how it looked, but I didn't like the added bulk. So that left French seams. Out came the seam ripper again, and I dismantled the top and re-sewed it. I'm very happy with the result. Lesson learned - use French seams on thin, raveling fabric...the first time.
So it's done. I just need some hot weather to wear it.
Very pretty! I'm trying to remember a project where I did NOT use a seam ripper, and absolutely none come to mind. You have a lot of patience. - Heather
ReplyDeleteSome call it patience, some call it obsession. But I do like the way this turned out and I'm glad I stuck with it.
DeleteThat's a great looking top and I hope you get one or two days of summer and get a chance to wear it with panache!
ReplyDeleteThat is fabulous. It's going to be 100F this weekend, so if you were here, you'd be wearing it or something like it.
ReplyDeleteoh I love your top, I"ve had this pattern in stash for ages, going home to find it tonight, thank you. And you are so very patient to sew with translation necessary, well done.
ReplyDelete