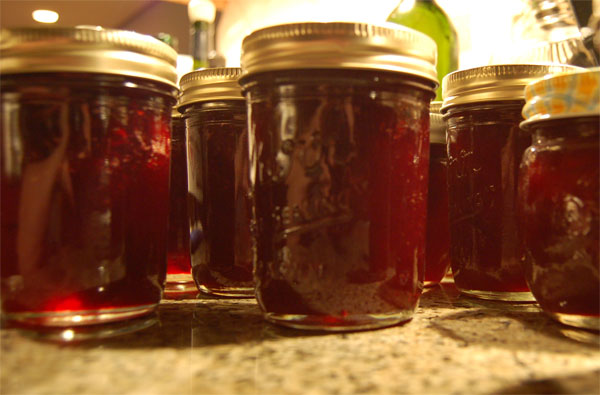
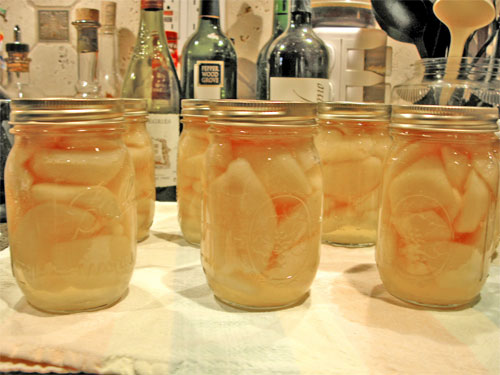
This is my third year making preserves. I've made apricot, plum, peach, and strawberry preserves and I've canned peaches and pears (whole pieces of fruit in a sugar syrup). I also made a tasty plum sauce. With the exception of the strawberries, all the fruit came from trees in our yard. While we grow strawberries, we don't yield nearly enough to make preserves, so we bought a flat of them from a roadside stand. I learned how to can from books and the internet. As I was stirring the syrupy mixture of plums and sugar to make more plum preserves on Saturday, I thought it might be nice to share what I know about making preserves.
Step 1 - The Fruit

If you are fortunate like I am to have the climate and yard to grow fruit trees, then you only have to harvest your own fruit. It helps to have a "trug" like these sold at leevalley.com:

If you don't have your own fruit trees, perhaps you can get ripe fruit at a good price at your local farmers market or roadside stand. Don't despair if all you have is the supermarket. You don't need bushels of fruit to make preserves. In fact, the recipes I have for fruit preserves typically call for about 2 lbs of fruit and you'll get about 5 half-pint jars out of it.
Step 2 - Equipment
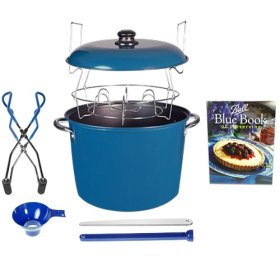
Preserving food was done out of necessity by our grandmothers, and their mothers, and their mothers... so you don't need a lot of equipment to do this. But it is better if you buy the right equipment. I use the "boiling-water" method of making jams. You can make freezer jam and you can use wax for sealing the jars, but I don't use those methods. The boiling-water method requires a large pot and mason jars with 2-piece lids. Only use modern jars - antique ones may be quaint but they may not seal properly and would not be safe to use. I also use a plastic funnel that has a wide mouth designed to fit the jars, and I use tongs specially designed to fit around the mason jars and useful to have when lifting the jars in and out of the water. Another useful tool is a stick with a magnet on the end for retrieving the lids from the hot water (the lids must be heated before putting them on the jars). I don't have one but I can see how it would be useful - I use tongs, which don't grab the lids very well. All of this equipment may be available at your hardware store (not the big-box kind though) and check your grocery store too. I'm sure you can buy them on-line as well. Just Google "canning supplies."
Step 3 - Recipe
I have the Ball Blue Book of Preserving and it contains everything you need as far as directions and recipes. This is one time when improvising is not a good idea. Follow the recipe and processing times. When I started making preserves I thought I could cut down on the amount of sugar but the fruit didn't seem to thicken as it cooked (sugar helps gel formation). So I added pectin (not called for in the recipe) and it thickened right away, but the final product out of the jars was nearly rock hard. I also thought I could double the batch to save time. Bad idea. Doubling the batch may make it cook unevenly. Stick to the recipe. Enough said.
Step 4 - Going for it

Set aside a couple of hours and don your apron to protect you from any juice splatters. Use a large cooking pot for cooking your fruit. Once it gets boiling it gets quite bubbly and frothy and believe me, you don't want the sticky fruit mixture overflowing your pot! I won't detail everything you need to know to make preserves, because it varies depending on what you're making. But the basic order is this:
1) Prepare the fruit (pit, peel, cut, whatever) according to the recipe. Unless the recipe calls for peeling the fruit, I leave the peels on because the skins add more color.
2) Heat the empty jars and lids to 180 degrees. I heat the jars in the big processing pot and the flat lids in a small sauce pan. You need the jars hot when you fill them, so while a dishwasher is fine for sterilizing them, they probably won't stay hot enough when it's time to fill them. You're not supposed to let the lids boil - I accidentally have and my jars still processed fine. The screw-on ring never touches food so don't worry about them. By the way, the flat lids can only be used once, so after you've enjoyed your jar of preserves, throw the flat lid away and only keep the jar and screw-on ring.
3) Cook the fruit according to the recipe. The froth will get kind of yellowy - you can skim this off with a spoon and dispose of it. The tricky part is telling when the fruit is done. This is when I wish I had the benefit of my grandmother's experience...but I'm about 30 years too late. I've tried to follow the "gel test" in the book but it just got me frustrated. However, I think I may be getting the hang of it now (especially now that I'm following the recipe!). While making the plum preserves this time, I noticed when the fruit reached boiling, it was quite frothy and almost boiling over. After it was boiling for a while, more fruit broke down and the liquid did thicken and the level of the mixture was lower. The temperature at which it's supposed to gel is 8 degrees above boiling, so if you're near sea level it's 212+8, or 220 degrees. I used a candy thermometer to confirm that I got pretty close to the gel point. The consistency of the cooked fruit at this point also looked nice and thick. The important thing is to cook it to 212 to kill bacteria. The preserves will thicken a bit more after they set. According to the Ball book, "a true preserve does not hold its shape when spooned from the jar."
4) Retrieve the jars from the hot water and fill them, again according to the recipe. For fruit preserves you generally fill to 1/4 inch from the top.
5) Put the lids on and return them to the big processing pot. Heat the water to boiling and leave the jars in for the time stated in the recipe.
6) After the processing time is over, turn off the heat, leave the jars in for 5 more minutes, then remove. You'll start hearing the tell-tale pop of the lids being pulled in by the vacuum inside the jar. This means you have a good seal.
That's about it. I haven't had any jars not seal and I haven't had any problems with my preserves. Despite past batches that were probably over-cooked, the preserves came out well. Even the rock-hard batch tasted good. Making preserves is pretty easy and safe as long as you use clean mason jars, follow the recipe, and follow the processing instructions.
The results are well worth it. The jars of preserves make good gifts - especially because we always have some on hand. I like to give them to friends and family because they're homemade and tasty. You do need to eat them within a few weeks of opening because they don't have the preservatives of commercially produced fruit spreads and may mold.
Happy canning!
My mother and grandmother used to have huge canning projects every summer -- what nice memories you brought back for me.
ReplyDeleteI got to your page by googling perserves that don't thicken. I was amazed when I read that you also knit!!
ReplyDeleteAnyway, I read your post and didn't see anything about the preserved not thickening. This is my first try, and like you, we have the fruit bushes, and trees. I made blackberry jam, followed the recipe exactly, but after it has cooled, it appears that the preserves are still really thin. I made 9 8oz jars and am worried about how well this turned out. I read that you boiled your fruit for way longer than my recipe called for. Mine said 1 minute. After that period it was very runny. I did thicken up some, but not as thick as it should be. I was wondering if I took the preserves out and tried boiling it till it got thick and then re-jarred them, if that would work. The reciped called for 3 oz of pectin, I used liquid. I wonder if I boiled again, and maybe added more pectin, if I would have a thicker preserve. What do you think? The mixture tasted so good, I would hate to not be able to use it as a preserve.