Wednesday, November 26, 2014

Last projects before packing

Packing? Yes, we're moving to a new town and new apartment about 2 hours north of here. So I have to stop the sewing and weaving for a bit until we get re-settled. At least knitting is portable!

I finished the orange-y scarf.


I also finished the Burda cardigan - #117 from the 8/2011 issue of Burda Style:


Here's my review:
 
Pattern Description: Loose fitting cardigan with raglan, two-piece sleeves and a softly flowing, "waterfall" type front.
 
Pattern Sizing: 36-44. I made the 44, which is according to my bust size. Normally in knit tops I make a 42, but I wanted to ensure this would fit comfortably over another garment without being snug. The resulting fit was a big large, which is fine over long sleeve tops in winter, but for summer wear I'd go down a size.
 
Did it look like the photo/drawing on the pattern envelope once you were done sewing with it? Yes, I think it did.
 
Were the instructions easy to follow? The instructions were very easy - and for the first time I realized that Burda numbers the seams on the pattern pieces in order of their construction. How did I never notice that before? I used a 4-thread overlock for all the seams and a coverstitch for all hems. The instructions call for using a folded over piece of cross-wise cut fabric as a facing on the back neck, which I omitted and instead I turned under the seam allowance and used my coverstitch. I also used the coverstitch for the front edge hems, instead of doing the twin-needle hem in the instructions.
 
What did you particularly like or dislike about the pattern? I wanted to replicate a RTW sweater and this was the closest pattern that I already had in my stash. The main difference is that this has raglan sleeves. The sleeves are two piece, which results in an underarm seam and another seam opposite it, running along the top of your arm down to your wrist. In my knit this extra seam just makes me annoyed because when I put on the cardigan I have to adjust the shoulders to line up this seam correctly.
 
Fabric Used: A lightweight, stretchy polyester/viscose/lycra (63%/34%/3%), purchased locally in Germany. My fabric has a pronounced knit texture on the right side and thus has wrong side but the variegated look of the fabric makes it less pronounced, I think (and hope).
 
  Pattern alterations or any design changes you made: I omitted the back neck facing during construction and shortened the sleeves by 1 1/2 inches.
 
Would you sew it again? Would you recommend it to others? I may sew it again and would recommend it.
 
Conclusion: My fabric choice wasn't ideal for this pattern since it has a wrong side, and the coverstitch makes the wrong side look different than the right side, but I think both of those fouls don't hugely detract from the look. As far as fit (sorry there's no photo of me wearing it - maybe I'll add one later), the raglan sleeves are quite comfortable but I'm distracted by the three seams that result at the shoulder. When I first put the cardigan on I find I have to tug at it to get the seams in the right place. However, if the cardigan were made in a lightweight wool, I could see how the two-piece sleeve would add shaping.


I'll leave you with some pictures of the space in our new apartment that I'll be using for my sewing area:


It's not a huge area but I'll make it work. My sewing machine cabinet has wheels so although it will have to be positioned in front of the shelves to access the outlets, I can move it aside if I need to get to the shelves. The doorway leads to a toilet and sink and some storage space. What it lacks in space it makes up for in light - it will be wonderful after being in a dark bedroom where I had to turn on lights even during the day. But the best feature is that when I turn to the left I see this:


Monday, November 17, 2014

Project roundup

I've been sewing, knitting, and weaving, but not blogging about it, so here's a long post to bring you up to date:

I finished some Husband Socks:


The yarn is a "discount supermarket" yarn. I kid you not, I bought it at the Netto discount supermarket here in Germany. The yarn is a 4-ply, 75% wool, 25% polyester and it's decent stuff. Decent at least for socks anyway. The label just says "Sockenwolle" and that it was manufactured for SILAG Handel AG, which is just a company that supplies consumer goods, so I have no idea really where the yarn comes from.

The pattern is the Garter Rib stitch from Charlene Schurch's book Sensational Knitted Socks. If you've never knit socks but are interested, this is the best book, I think. The book explains the parts of the sock and has instructions for making a sample "first sock." The best part of the book though is that you can make any size sock, in a multitude of patterns, either top down or toe-up, and with 4 or 5 double point needles or 2 circular needles. And if there aren't enough patterns in the book for you, there's a second book, More Sensational Knitted Socks.

For these top-down socks I used the Old Norwegian Cast On, and for the heel I used Eye of Partridge.


I knit a scarf:


It was more about using up the yarn than about wanting this scarf, but I do like the way it turned out and have named it my "Snowball Scarf". I alternated two knitted rows of Schachenmayr SMC Sheila Soft Mini (a fuzzy yarn) with two knitted rows of Schoeller + Stahl Alpha (a smooth yarn). The 50 gram balls of the Alpha had less yardage than the fuzzy one so I just knit until I ran out of the two balls of Alpha. I cast on 25 stitches on size 11 needles and then joined the ends so that I could just loop the scarf around twice around my neck. It was easy, mindless knitting while watching TV, and I used up some stash yarn. Hooray!


I finished a weaving project:


The weaving for this scarf went very quickly, but the twisting of the 316 fringes...not so fast. I have this fringe twister* but it still takes time. The finished length off the loom was 69 inches but after washing in a tub of 40 degree water (per the care label on the yarn) it shrank by 3 inches in length. The yarn is a bit scratchier than I'd prefer but overall I am happy with the way the scarf turned out.

I absolutely love that you can alternate colors in the warp and the weft and make a pattern - hounds tooth in this case. I used my Schacht rigid heddle for this, so it's a plain weave but it has inspired me to warp my Schacht 4-shaft and make one in a twill. The yarn is Lana Grossa, which I purchased in the Müller drug store. Well, not actually a "drug" store since they don't dispense drugs there, but it's like a U.S. drug store without the pharmacy: perfume, makeup, personal products, homeopathic remedies, some organic foods, candy, stationery (pens, pencils, notebooks, etc), toys, household goods...and yarn.

Specifically, the yarn is Lana Grossa Meilenweit. It's 80% wool, 20 % polyester. I used 4 balls (2 of each color) with some leftover


I started another weaving project:


This one is also woven on the rigid heddle - no I did not get the 4-shaft warped...yet. The yarn is Drops 100% Alpaca. My goal for this is a softer scarf (and a colorful one!) but the alpaca may not have been the best choice for a warp yarn. I've had one occasion where one ply got cut by the heddle, and I didn't notice it until the loose ply got backed up behind the heddle, leaving one thin warp yarn. I was able to wrap the loose ply around the other one and carefully continued to weave. Fortunately this won't be a long scarf, but it's a lesson learned about using a soft yarn that doesn't stand up to abrasion in the warp. I kind of knew this already from reading weaving books, but I threw caution the wind on this project. I'm also gambling on having enough yarn left. I only had one ball of each color (orange, brown, and gray) so I purposely designed this plaid to use all three colors evenly between warp and weft. We'll see if my calculations were correct!


I finished sewing a top:


The pattern is New Look 6150, although I used the pattern from the Meine Nähmode magazine, a German magazine that republishes Simplicity and New Look patterns.


The fabric is a rayon knit, purchased locally. I was hoping to make a casual type top but the fabric is thinner and has more drape than I envisioned in my head. I see wearing this top under a suit jacket, though I don't have the occasion to wear suits right now.

The top was fairly easy to sew. I had some difficulty understanding the German instructions for the collar but fortunately Pattern Review came to the rescue. I wasn't the first person to have difficulty...even in English. If you're sewing the same pattern, or one similar, here is a link to a discussion on how to sew the collar.


And finally, I started a new sewing project. I'm making this jacket from the August 2011 Burda Style magazine:


I've gotten as far as tracing the pattern, which you know is not a  small task if you've ever used the Burda magazine patterns.


* I was not compensated in any way to pitch the fringe twister or the online store; however, I do like the items I have bought from them and think they have very good prices.

Friday, October 17, 2014

The fabric market was in town!

In our city have a fruit/vegetable/flower market three times a week and an antique market once a week and twice a year there is a fabric market. I went to it last spring with my mom (here's my post about it). I saw an advertisement that they'd be back today, so I've had this date firmly planted in my mind for a while now. Every time I "found" myself in a fabric store I reminded myself that the fabric market was coming and to wait. The day finally came, it's rainy, and I have a cold, but I went anyway. I'm not sure that cold medicine and fabric market shopping go together very well though. I couldn't make any decisions, and the crowds were bugging me (yes there were crowds of fabric shoppers!). I wanted to buy everything...or nothing because I haven't a lot of room for a fabric stash, and I do have a fabric stash. I wanted to buy really nice fabric, because there was a lot of nice stuff available, but I didn't want to spend a lot of money. There were bargains but not a lot of those fabrics where ones I could justify buying without a plan for using it. Eventually I did buy fabric and somehow even managed to make some "capsule" choices despite my brain-on-cold-medicine. Here's my haul:


Going clockwise from the upper left:

  • fleece with embroidered designs - I regretted this purchase shortly afterward (I blame the cold) but it was relatively inexpensive, and I will use it for a jacket or something
  • gray sweatshirt fabric to hopefully pair with some other fabric to make a "designer" sweatshirt before the fad is gone
  • black faux leather to use for trims and embellishments - maybe for that designer sweatshirt
  • gray capsule - from left to right: printed jersey for a top, solid bottom weight for pants, solid jersey for a top
  • zippers
  • serger needles
  • the green/blue is overdyed denim to make a skirt
  • indigo dyed denim for a skirt or jacket
  • brown/gold capsule - from left to right: wool/silk knit for a skirt, solid bottom weight with stretch for pants (I'm thinking Vogue 1378), rayon woven for a blouse
  • the big snaps are for a jacket that's on my to-do list
  • 8 cones of serger thread (for 15 Euro - about $19). Serger thread is pricey here and colors limited. Rather than buy 3-4 spools of colors, I buy 1 and use the EZ Winder.  

Tuesday, September 30, 2014

Because you're never too old to wear monkey pajamas

My latest creation:


I used Kwik Sew 2811  for these pajamas. I can't believe it's been over 11 1/2 years since I first used that pattern to make these upside down print flannel pajamas. I did learn from that silly mistake and now double and triple check when I'm cutting out a print. I still have those pajamas and as you'd expect they are well worn, although I didn't wear them much in the warmer California winters. For this project I also used flannel, but even though it's colder here in Germany, menopause keeps me warm. ;-)

Perhaps you notice my meticulous matching across the front of the top (don't look at the shorts). I only did that because it occurred to me that I've never tried to match the print on a button-front blouse before, so this seemed like a good time to practice. First off, depending on the scale of the print and the repeat, you may need extra fabric, which I did not have but I got lucky. You need to cut each front piece separately, but you also have to position the pattern pieces strategically. Figure out where the front pieces will meet, taking into account seam allowances and facings and make marks on your pattern piece so you can line it up correctly for the second side.

I didn't have enough fabric to make the print on the shorts line up with the top or even have good pattern placement. At the time I cut them out I was worried that the shorts would be too short so I added 3 inches to the length. It turned out that was 2 inches too many, so I ultimately trimmed them down to only 1 inch of extra length. Maybe I would have had more wiggle room for pattern placement had I not added so much extra length, but these are just pajamas after all.

Here's my review of the pattern:

Pattern Description: From the pattern envelope: Misses' pajamas. Shirt has front button closure, collar, pocket and pocket band and sleeve cuffs. Pull-on pants and shorts have elastic in casing on back and ties on front. Long or short sleeve options and long or short pant options.

Pattern Sizing: XS-XL. I made a size M in the top and L in the shorts. My measurements put me between M-L on top and L-XL on bottom but this pattern has quite a bit of ease. These pajamas fit me very comfortably with quite adequate ease for sleeping.

Did it look like the photo/drawing on the pattern envelope once you were done sewing with it? Yes!

Were the instructions easy to follow? Yes, they were easy and I did follow them. The only area that was tricky was sewing on the collar. The instructions want you to sew the facing part of the collar along with one side of the separate collar piece in one pass, being careful not to catch the other side of the separate collar piece, which is to be used to cover up the collar seam allowance raw edges. I thought sewing all this in one pass was awkward, so I first sewed the separate collar piece and then went back and sewed each facing side. Much easier.

What did you particularly like or dislike about the pattern? I like the style and the comfort of these pajamas. Kwik Sew has a newer version: 3553. Besides the lack of contrasting sleeve bands and no shorts option, I don't know how it differs.

Fabric Used: Flannel

Pattern alterations or any design changes you made: I didn't make any changes except to cut out the drawstring from the contrasting fabric to make it more fun.

Would you sew it again? Would you recommend it to others? I already plan to adapt the shirt into a longer sleep shirt with no pants.

Conclusion: A good, timeless pattern.

Monday, September 08, 2014

New Look...in German

I just finished this summer top, but I probably won't get a chance to wear it until next summer. It wouldn’t have mattered if I’d finished it a month ago because this summer has been quite unseasonably cool.


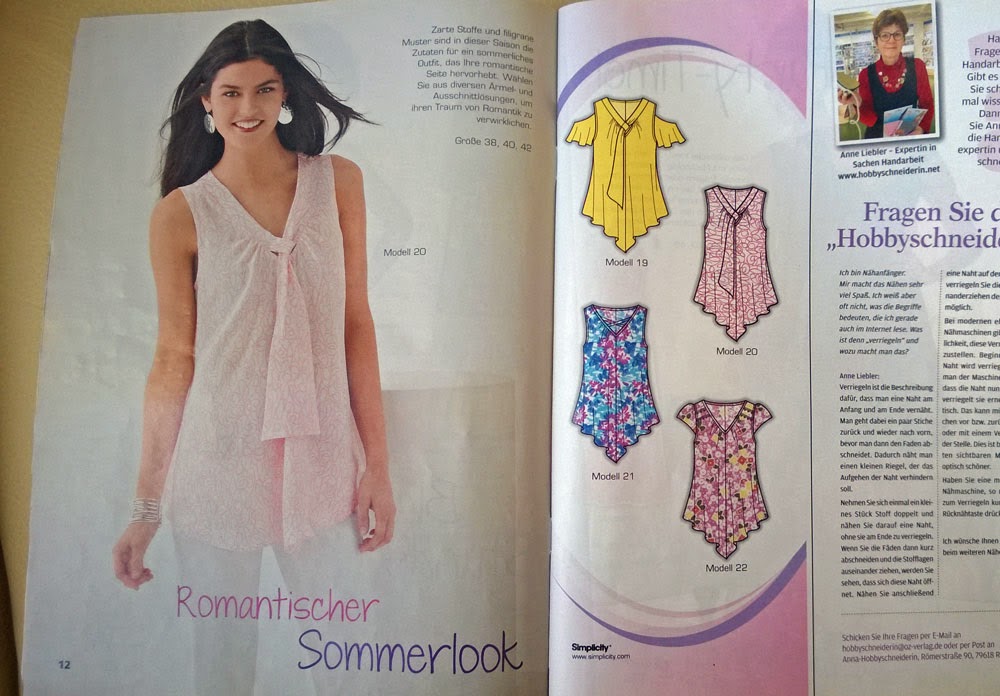
The fabric is cotton voile, purchased a year ago as a remnant from the Kartstadt department store fabric section. The pattern is from the Simplicity Meine Nähmode magazine, issue 3/2014, but it’s actually the New Look 6213 pattern.

When I get the magazine, I match the pictures to the Simplicity or New Look pattern. There are about 12-13 different patterns in each magazine.
 
The magazine is published in Germany by OZ-Verlags-GmbH four times a year. 


I "just" have to trace them off!
Sometimes not all views or sizes of the patterns are offered, and the patterns are not the latest ones (and sometimes OOP), but it's a great way for me to get Simplicity and New Look without having to order them online and pay full price. The difficulty of course is that I must trace the pattern, and the instructions are in German. Oh, and these are not your typical European magazine instructions - they are not brief! Also, since my knowledge of German is still fairly basic, especially for sewing terms, I had to translate nearly every word because with so much text, I could not really tell what was important or not.

The first big question I had was: are the seam allowances included or not? It turns out they are, which is not like most European magazine patterns. However, it makes sense that the seam allowances are included here - why would they go to the trouble of redrawing the pattern pieces to remove them? Buried in a page of (a lot of) information about pattern markings and tips on sewing, it says that seam allowances are 1.5 cm (5/8") unless otherwise marked - although the patterns reproduced for the magazine contain very little in the way of markings. Also, not all the pattern pieces are included. If the piece is rectangular or square, they provide you with the dimensions, just like with Burda patterns I've used. That's not a problem, except that some of the pictures and instructions refer to notches and markings on those rectangular pieces and of course you have none.

For the most part this is a simple, straightforward top to sew, but I got bogged down by the instructions for the front band and ties. I couldn't tell how the band and ties were sewn on from the itty-bitty illustrations so I had to do a lot of unnecessary translation of instructions I didn't need. I didn't have extra fabric to cut new pieces so I wanted to be careful not to make mistakes that could not be fixed with a seam ripper.

One snag I had was with a word that I thought at first was just the last word in a sentence but turned out to be an abbreviation. To translate the German, I was using an app on my phone. I was perplexed when vord translated as 19A (what???) until I realized that vord is an abbreviation for vorderseite, meaning front side. It also took a bit of searching on the internet to find the sewing meaning of the word Blende. The word is not in my Ger-Eng dictionary, and the translator tool kept calling it aperture. It turns out it refers to the band that attaches at the neck - there's one with a loop (mit Schlaufe) and one with a tie (mit Schal).

Seeing that I was frustrated with these instructions, my husband suggested a brilliant, simple solution. Make a sample. I did, and once I understood the neckline, construction of the top went smoothly from there...until I melted the thread.

I had finished the raw seam edges with a three-thread overlock to keep them from raveling, but when I went to press the seams one more time, I was horrified to see the serger thread glob together and melt. I've never had this happen before. This is polyester serger thread I purchased here in Germany, a brand I've never used before,  so maybe the thread I've been using in the past was more tolerant to heat, or maybe because I mostly use the serger on knits and don't press them (with a hot iron), I haven't encountered this before. At any rate, I didn't want to run the risk of melting the thread in the future, so I pulled out all the serger thread. Frankly I didn't like the way it looked anyway. I used a beige thread and although the color was invisible through the thin fabric, the texture from the overlock loops was noticeable. My choices of finishing the seams were now: pinking shears, Hong Kong finish and French seams. I don't have any pinking shears here and didn't want to run out and buy any, so that option was out - and besides, I think a pinked edge screams "homemade". I had just enough fabric left for a Hong Kong finish (applying binding to the raw edge) so I tried it on one seam to see how it looked, but I didn't like the added bulk. So that left French seams. Out came the seam ripper again, and I dismantled the top and re-sewed it. I'm very happy with the result. Lesson learned - use French seams on thin, raveling fabric...the first time.

So it's done. I just need some hot weather to wear it.

Thursday, August 28, 2014

Finding style

First - I hate you blogspot! I should have written my post somewhere else first and then posted it because blogspot ate my post! Grrrrrrr!

Well, here's take two to the post I spent way too much time composing this afternoon!

I envy women who have style - women who look comfortable and complete in their clothing and accessories. I realize that this takes effort and time.  A lucky woman might have a great wardrobe and/or a great body so that whatever she pulls out of her closet looks great, but to make it complete one still needs to know what to combine and how to accessorize it.

I have neither a great wardrobe nor a great body, but I do feel like I have style...albeit in my head. I have lots of ideas and opinions about what I like and don't like, but not much seems to make it into what I wear. If only Cinderella's birds and mice could turn my fabric and pattern stash into the wardrobe I envision!

I could use these helpers!

Of course I could just buy clothing instead of waiting for my fabric and pattern stash to magically turn into a great wardrobe, except that I really don't like to shop. I used to love to shop for clothes when I was a teenager, but these days I am overwhelmed by the volume of clothing in the department stores, and I am intimidated by boutiques. I think, probably unrealistically, that clothing in boutiques will be pricey, and everything will be smaller than size 10. I am also afraid of the boutique salesperson talking me into buying something I will regret. After all, style is personal, and the salesperson is a stranger who has nothing to go on except for the clothing style I wear coming in. (And no, I do not have any girlfriends to go shopping with.) This is of course based on the assumption that salespeople in boutiques help the customer. If I have to shop I still prefer the anonymity of the department store. Except for Nordstrom's there isn't anyone to help (or bother) you in the department store. They've cut corners. Sales are now handled in centralized kiosks, and they don't have enough people to keep the racks neat and return clothing to them. The dressing rooms are a mess, which is of course really the fault of piggy-shoppers...but I digress. I view the department and franchise stores (Zara, H&M, etc.) as a sea of cheap clothing, churning over with new styles every few weeks to whet the appetite of chronic shoppers. The prices may be low but I have no place in my closet for thin, throwaway clothes. I am also dismayed at the inability to find a middle ground between junior "sexy" and middle age boring. But most of the time when I'm shopping for clothes I think that I should be home sewing them instead!

So what is my style? It's safe to say that what's in my closet is rather boring - I did say that I don't have a great wardrobe. Since I'm not working outside the home, I haven't had a real incentive to pay attention to what I wear. Most days I just pull out whatever is clean and fits, which is typically jeans and a t-shirt type shirt. My jewelry consists of a watch, my wedding rings, and earrings. The earrings rotate among three or four pairs even though I have a jewelry box full of earrings - as well as necklaces and bracelets. My shoes are usually flat, comfortable shoes due to problem feet. My most comfortable shoe is actually a sneaker, but they're black so I pretend they're not sneakers. With all the walking I do here, both everyday grocery store runs and marathon walking when I tour the cities of Europe, comfort is paramount.

I've decided that I want to find a better style. I need to work with what I've got since I won't go shopping, and I don't think there will be any magic mice and birds to help me sew. I'm a perfectionist so I probably wouldn't want their help anyway! Today I needed to go to the produce market downtown so I dressed in my usual jeans and t-shirt. But I dressed it up just a little, with a bracelet, different earrings, a necklace, a scarf, and I put on some low heel, ankle boots since I wasn't going to be walking far. I felt better walking around, a little like someone with some style. What do you think?

Just a little bit more style to my usual casual wear

Monday, August 18, 2014

Where has the summer gone?

It's mid-August and I haven't posted since June. I haven't sewn anything since June partly because I've been busy with house guests, but also because what I wanted to sew is for summer, and now it's cold out! Well ok, not cold, but it's not typical August hot here:


I would much rather have these temps than hot (no a/c here!) but I'm not really motivated to work on the summer tops I was going to make. I traced off a couple of patterns in June, but this is as far as I got with one of them:


With some creative layout, I think I will be able to squeeze out New Look 6213. Fortunately the fabric doesn't have a direction to it.


Wednesday, June 25, 2014

Just a nightshirt

It's just a nightshirt, but it is another sewing project completed:


The pattern is Kwik Sew 2821, one that I've used before.

 
The fabric I used is a thin, drapey cotton-viscose (rayon) remnant I found at the department store fabric section. I was drawn to the print but immediately knew I wanted to use it as a nightshirt. I really like the way the flowers look like they're hand painted, and if I were an edgier, artsier person, I would have made an edgier, artsier top out of this fabric...but I'm not, so it's just a boring nightshirt. The print is a panel-print on only part of the fabric: the flower motif repeats every meter with nothing printed on the other half of the fabric. I used one motif for the front and decided to use the plain fabric for the back, sleeves and the bands on the neck and sleeves. I used my serger for almost every part of the construction so it was fast and easy.
 
My next project will be a bit more interesting (I hope). I'm making the BurdaStyle top in the picture below, though you can't see it very well in the model's photo.
 
 
I'm thinking of making some minor changes to the sleeves and front, but we'll see. I won't have a lot of sewing time in the next couple of months because we have trips to Croatia, Norway and Paris planned, and family is visiting. It's going to be a busy summer!


Friday, June 20, 2014

Spaghetti

And you thought Burda pattern sheets were bad. This is the pattern sheet in  Meine Nähmode:


Meine Nähmode is a German pattern magazine that reprints Simplicity and New Look patterns. I think the magazine is a bargain at about $7.50 (€5.50) for 12-13 patterns (especially because I can't get Simplicity and New Look patterns here), but not all sizes or views are available and I have to trace the pattern. Somewhere in that black and red spaghetti mess are the pattern pieces to New Look 6150:

Pattern envelope picture form Simplicity.com
 
 
As shown in the magazine, with the fabric I'll be using


How I add seam allowances

I made a short video to show how I use a 6 inch quilting ruler to add seam allowances to traced patterns. I use this method when I trace patterns from BurdaStyle and other European sewing magazines since they don't include seam allowances.


Monday, June 02, 2014

Trip to Barcelona


I'd been wanting to get here for many years and finally did. It was a lovely long weekend. You can see many of our pictures here on Flickr. (The Flickr interface may show you a sort of collage of all the pictures - you can click on the first one to see it and the description I wrote about it and then step through each one)

Of course I had to find the yarn and fabric stores.


All You Knit is Love
8 Carrer de la Barra de Ferro
 
Ribes & Casals
Roger de Lluria 7 
There were two other fabric stores on the same street as Ribes & Casals and they were all bustling on a Saturday afternoon. So nice to see people sewing...or at least buying fabric. Ribes & Casals was the largest with two floors - the lower floor appeared to be all thread and notions and stuff while the main floor was filled with tables piled with rolls of fabric. Though none appeared to be very high end, the quality seemed good and the prices were very nice - at least half of the prices I've seen in Germany.

My souvenirs:

Yarn, fabric and a Patrones!
 

The yarn is lace-weight merino/silk from Great and the Fibers, and the fabric is a polyester knit jersey. And of course I had to get a Patrones. I can get them in Germany but for almost 3x the price since they're imported here.

Knowing how to sew means never having gaping armholes...

I made this top from Kwik Sew 2844. I've had the pattern for so long now that it is out of print. 

Kwik Sew 2844
 
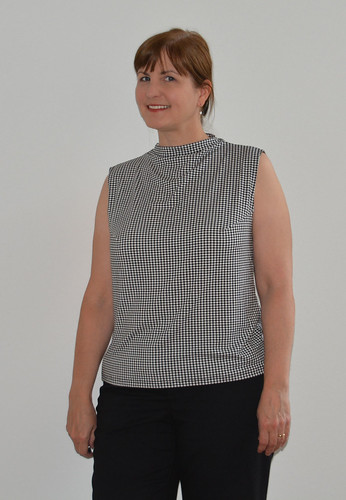
It was a really simple thing to sew, just two pattern pieces and only shoulder, side seams and hems to worry about. However, when I put it on I had quite a bit of gaping in the front armholes and my bra was visible. Not good, but sadly also not unlike what I see a lot of women wearing. This pattern and, in my opinion, a lot of cheap RTW clothes like it, are not designed for someone with breasts! I wasn't going to wear it as-is nor did I want to throw it away, so I made bust darts to close up the gap and make it fit better.  And yes, I do seem to be in a black and white phase - out of the last five things I've made, four have been black and white. There is more colorful fabric in my sewing queue.
 
Even though it's out of print, here's the Kwik Sew pattern info and my review:


Fabric Used: 4-way stretch cotton lycra, with perhaps a bit too much stretch for this pattern but since I ended up making it less-snug the fabric drapes rather than clings, which is a good thing! I've had this fabric for a long time too, almost as long as the pattern.

Did it look like the photo/drawing on the pattern envelope once you were done sewing with it? Yes, but I left off the front pocket and added darts.

Were the instructions easy to follow? The pattern is only two pieces (three if you include the pocket). I used my serger 4-thread overlock for the shoulder and side seams and cover stitch for the hems. I used fusible straight tape for the shoulder seams, as I do on all knits. I also cover-stitched the funnel neck hem, although the instructions call for just turning the facing over and securing it at the side seams only. A beginner can follow the instructions but they may be a bit confusing because they have you jump all over the place since parts of the instructions apply to the different views.

What did you particularly like or dislike about the pattern? I liked the simple lines, wider shoulder (hides the bra-strap well), and I think the funnel neck is a nice change from a plain round or jewel neck. I've had this pattern for a long, long time. I'd envisioned it in the fabric I eventually made it in.

Pattern alterations or any design changes you made: I added the bust darts after I'd sewn it up. My measurements put me between the medium and large sizes in Kwik Sew, but the large ended up a bit too big and I had major "gap-osis" in the front armhole. I pinned out the excess into a dart and adjusted the hem of the armhole as best I could. Since the shoulders were a bit too wide as well so I had to adjust the armhole hem anyway. In hindsight I maybe should have started with the medium and done a FBA and added a bit to the waist.

Would you sew it again? Would you recommend it to others? I may make this again - with darts. Or I may experiment with the medium size and a FBA. Since I've never done a FBA, this may be a good pattern to try it on.

Conclusion: The top turned out really comfortable. I shouldn't have waited so long to make it!

Friday, May 30, 2014

Photos from a textile factory museum

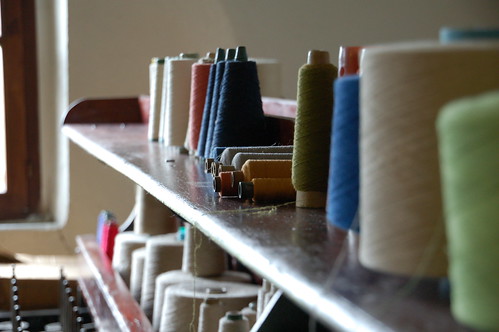
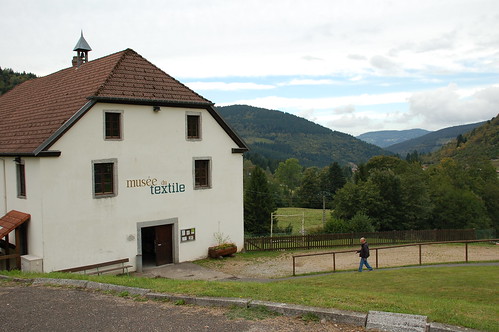
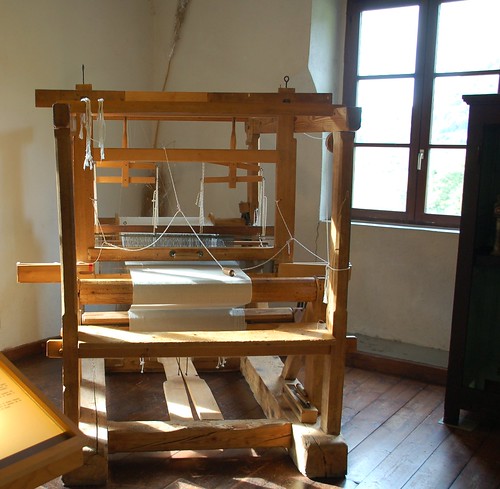
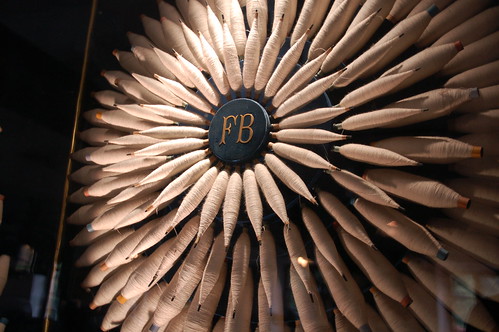
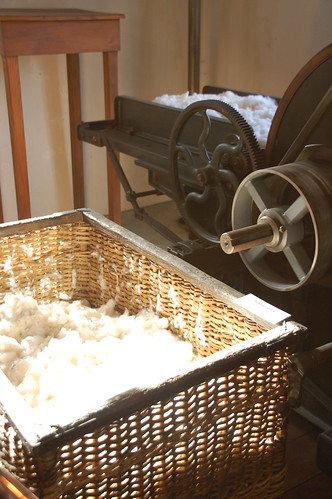
A while ago - actually about a year and a half ago - I visited a textile factory museum in Ventron, France. I came across the photos and realized I'd never shared them. Here are some highlights, but you can see a few more over on my Flickr site.

Textile Museum
Textile Museum
Textile Museum
Textile Museum
Textile Museum
 
The museum is in a lovely setting in the Vosges mountains of eastern France. Many families in this isolated area of France were once employed by this factory and others like it in the region. They were very proud of the cloth and thread they produced. But with the industrial progress after WWII, textile production turned large-scale and relocated to mostly Asian countries, causing the factories here to close.

Wednesday, May 21, 2014

It's a weaving bench...it's a yarn winding station

I'm glad I invested in a weaving bench because it is nice to sit on, complements my loom nicely, and I can use it as a winding station!