More pajamas. I wanted another pair of summer-weight pajamas but I tried a different pattern this time and kind of wish I hadn't. My
Kwik Sew 2811 pattern is a winner while the Burdastyle pattern I used for the top was not. I'm not happy with how they look, but my husband likes them. Of course he also saw how much time and effort I put into these.
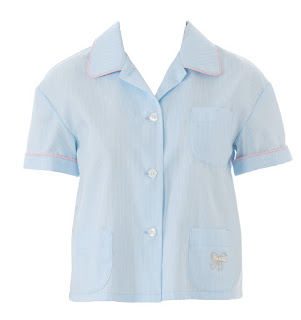
The top is Burdastyle #133 from 12/2014 and the shorts are Burdastyle #123 from 1/2017
 |
| The pleat in the back adds more volume to the top |
My primary problem with the pattern is with the sleeves. I didn't know they would be so off the shoulder, and I don't like them. The sleeve has a little bit of fullness to it and it just looks weird to me. The Kwik Sew pajama top also has dropped sleeves, but they're not as low. Also, the Kwik Sew sleeves have less ease and could be easily sewn in flat while these Burda sleeves are set in, and I had to run a line of basting to handle the ease. I didn't make a muslin of this pattern because it was "just" sleepwear, and though I did compare the flat pattern to the Kwik Sew to see that it would fit about the same, I didn't notice the wide shoulders. I was really shocked when I put it on and the sleeves sort of poofed out. Some of the poofiness went away after I pressed them, but looking at the model picture and dressform picture, you can see how much the sleeves hang down.

I also think the top is too short. I thought that might happen and would have made it longer, but I didn't have enough fabric.
My main objection with this pattern was in the construction. The collar was really difficult to put in and I think unnecessarily so. The collar piece was rather curved and I fought with it to get it to shape to the tightly curved neckline. The collar on the Kwik Sew pattern is flatter and I never had any trouble with it. The other difference is in how the collars are attached at the back neck. The Kwik Sew collar uses two different pattern pieces, one for the upper and one for the under collar and the bottom edge of the upper collar is used to hide the seam allowance at the back neck. The Burda technique used one pattern piece for both the upper and lower collar and a bias strip to cover the back neck seam allowances. It made for a lot of bulk. I ended up sewing the collar on first and clipping the seams to get it to conform, and then I sewed the seam again with the facing and bias strip in place. It was tough.
Here's a picture of the pattern pieces with my annotation on what's what. You can see (hopefully) where the collar piece matches at the shoulder and then again near the fold of the facing, but the collar has a good amount of curve that doesn't easily fit into the tight curve of the neck.
The other changes I made were to add interfacing to the front facings (the pattern only called for interfacing the collar). I also doubled the fabric for the cuff to give it more weight. I left the pockets off because I thought they'd get lost in my busy print. And I didn't want to bother with them anyway!
I used a folded over ribbon instead of piping. I had the piece of ribbon in my stash - it was purchased many years ago at my favorite ribbon shop in Paris,
La Mercerie Parisienne , and I finally had a use for it. I thought the shimmery blue looked like water and go well with the fish motif. It was a little difficult to use it for this purpose though as it didn't want to go around the curve of the collar very well. And I found out that the ribbon melted immediately under the iron (I'd tried a sample fortunately!) so I used a press cloth and had to be extra careful pressing the top during construction. But the ribbon trimmed turned out exactly as I imagined it would.
I was also thrilled to find shimmery blue buttons, purchased at my favorite little fabric/button store downtown in Wiesbaden.
The fabric is cotton lawn that I bought from fabric.com a long time ago. The selvage has "Tori Richard" written on it. A search on the internet shows that Tori Richard makes Hawaiian shirts and they design their own textile prints. Maybe this was a mill end or an unused fabric from their collection.
I will wear these pajamas - after all the work I put into them - but I don't recommend this pattern and won't be making this top again.
The shorts were far easier to sew and turned out well, I think. This is a plus size pattern. Here's the line drawing - just a simple elastic waist and curved bottom hem.
I didn't add any trim or lace to the bottom hem. If I'd had more of the ribbon I would have put that on the bottom, but instead I just made a narrow hem. I used a technique I learned from a Threads video by Louise Cutting. First you serge the curved edge and turn it under, pressing it down. Then you run a basting stitch close to the edge of the curved part and gather it slightly to that you can get it to turn under again. Press and stitch.
Now I can move on to another project. Yay! I have a pattern traced and ready for a Burda robe, but I'm a little tired of loungewear/sleepwear right now.


